Custom Embroidered Pet Carrier: Logo Options
Four embroidery routes work on a custom pet carrier: flat satin and fill, 3D puff, applique and chenille, plus embroidered patches and badges. Choice is driven by stitch count, surface padding and brand positioning. Entry is MOQ 500 pieces per colourway.
Embroidery is the decoration method customers read as permanence. Unlike a print, it has physical depth, it does not crack, and it survives abrasion on the panels that take the most contact, which is why it remains the default for heritage, outdoor and premium positioning. This guide covers the four practical routes - flat satin and fill embroidery, 3D puff, applique and chenille - together with the technical decisions behind them: thread type, backing and stabiliser, digitising, minimum legible letter height, thread colour matching and placement on padded or curved surfaces. Cost in embroidery is driven by stitch count, not by colour count, which makes it behave differently from printing and rewards simplified artwork. Commercial floor is MOQ 500 pieces per colourway, sample rounds run 6-10 working days each, and bulk production runs 35-50 days after sample approval and deposit. Every shipment releases against an AQL 2.5 inspection report, and thread colour is approved against physical Pantone references under controlled lighting before bulk cutting begins.
A custom pet bag programme is usually a size ladder rather than a single style, and the ladder is what determines how many colourways you can afford.
When Embroidery Is the Right Choice - and When It Is Not
Embroidery answers a positioning question before it answers a technical one. A customer touching an embroidered mark reads craft, durability and price, which is why outdoor, heritage and boutique brands default to it and why fast-fashion or technical brands often do not.
It is the right choice in four situations. First, when the surface is padded, quilted or curved, because thread follows the surface where a flat print would bridge or distort. Second, when the product will be abraded - handle areas, base panels, strap contact points - because embroidery has no film to crack. Third, when the brand identity is built on craft or heritage, where the stitch itself is part of the message. Fourth, when the mark is small and simple, because embroidery renders a compact icon beautifully.
It is the wrong choice in three situations. Photographic or gradient artwork cannot be stitched. Very fine detail below roughly 1 mm of stroke disappears into the thread. And large coverage areas become heavy, expensive and stiff, since embroidery cost is driven by stitch count - a full-panel embroidered design is both costly and uncomfortable in the hand.
A useful hybrid: an embroidered primary mark plus a printed secondary motif. The mark carries the perceived quality, the print carries the complexity, and both share one colour system. Our design team specifies them together so that thread and ink agree under the same light.
Budget-wise, embroidery rewards restraint: one well-executed mark at one placement reads deliberate, while three small marks across three panels reads as uncertainty and costs more in stitch count.
The Four Routes: Flat, 3D Puff, Applique and Chenille
Flat embroidery is the foundation and covers most branded programs. Satin stitch produces smooth, glossy columns ideal for lettering and narrow shapes; fill or tatami stitch covers larger areas with a textured, matte surface; and a running or chain stitch handles outlines and fine detail. Most logos are a combination: satin letters on a filled ground.
3D puff embroidery places foam under the satin stitch, which is stitched over and then the excess removed, leaving a raised sculpted mark. It is the strongest option for a single bold icon or a short wordmark and is widely used in streetwear and sports-adjacent branding. It requires simplified artwork with generous stroke widths, because the foam cannot hold fine detail, and it performs best on structured, stable panels rather than on soft or stretchy ones.
Applique embroidery stitches shaped fabric pieces onto the panel and finishes the edges with satin stitch. It delivers large colour areas at a fraction of the stitch count of a filled design - a genuine cost advantage for big, simple shapes - and it lets a brand combine a contrasting fabric, such as a canvas logo on a nylon shell. Edge finishing quality is what separates a premium applique from a cheap one, so the satin border width and stitch density should be specified.
Chenille is the vintage route: looped yarn producing a soft, plush, slightly fuzzy surface associated with varsity and collegiate styling. It reads nostalgic and tactile, suits letterforms and simple badges, and is less crisp than satin, so it is not appropriate for detailed marks.
| Route | Visual character | Stitch density | Best artwork | Cost driver | Positioning |
|---|---|---|---|---|---|
| Flat satin | Glossy, crisp, precise | Medium | Lettering, narrow shapes | Column width | Heritage, tailored |
| Flat fill | Matte, textured ground | High | Solid shapes, badges | Coverage area | Outdoor, utility |
| 3D puff | Raised, sculpted | High over foam | Bold icon, short wordmark | Foam plus satin coverage | Streetwear, sport |
| Applique | Layered fabric, stitched edge | Low | Large simple shapes | Fabric pieces plus border | Rugged, workwear |
| Chenille | Plush, looped, nostalgic | Medium | Letters, varsity badges | Yarn coverage | Vintage, collegiate |
| Embroidered patch | Sew-on or iron-on badge | Medium | Badges, crests | Patch size plus application | Any, flexible placement |
Embroidered patches deserve a specific mention because they solve a placement problem: a badge can be applied to a curved or padded area that a machine head cannot reach, and it can be developed once and applied across several products in a line.
Thread, Backing and Stabiliser: What Sits Behind the Stitch
The visible result of embroidery is thread, but the durability of the result is decided by what sits behind it. Specifying both is what separates a mark that still looks right after a season from one that puckers or unravels.
Thread selection is usually between polyester, rayon and specialty types. Polyester thread is strong, colour-fast, chlorine and bleach resistant, and holds shade well in washing - the default for a product that will be laundered. Rayon thread has a higher sheen and a richer appearance, which suits premium presentation, but it is less resistant to abrasion and to harsh washing. Metallic thread delivers a light-catching effect and requires slower stitching and simpler artwork, because it is brittle and breaks at high speed.
Backing and stabiliser are the hidden specification. A cutaway backing stays permanently behind the design and provides lasting stability; a tearaway backing is removed after stitching and suits stable, woven fabrics; a wash-away topping film is used on top of pile or textured surfaces to stop stitches sinking in. On a soft-sided carrier with a padded panel, the wrong backing produces puckering around the mark within a few weeks.
Needle and density also matter. A needle that is too large for the fabric leaves visible holes; a stitch density that is too high on a light fabric pulls it into puckers. Our production team matches needle size, thread weight and density to the specific shell and states the combination in the tech pack so that a reorder reproduces the approved result.
Where a mark sits against skin-contact areas or a washable lining cover, thread and backing should also be assessed for substance compliance, and OEKO-TEX certified inputs are available where a retail buyer requires them - see OEKO-TEX.
Digitising: The File That Decides the Result
Digitising converts vector artwork into a stitch file, and it is the single most underestimated step in an embroidered program. Two digitised versions of the same logo can differ visibly in quality, and the difference is not artistic - it is technical.
A digitising file specifies stitch type per region, stitch direction, density, underlay, pull compensation, and the order in which regions are sewn. Underlay stabilises the fabric and stops the design distorting; pull compensation widens shapes slightly to counter the fabric's tendency to draw inward; and stitch direction determines how light catches the surface, which is why a satin column stitched at a consistent angle looks intentional and one with wandering direction looks cheap.
Start from vector artwork, always. A digitised file produced from a raster image inherits every artefact of the image, and cleaning it afterwards takes longer than supplying vectors in the first place. Supply the artwork with regions marked by colour and, where relevant, note which regions are satin and which are fill.
Approve a physical sewn sample rather than a digital simulation. Simulations show the intended design; only a sewn sample on the production fabric shows puckering, thread sheen, coverage gaps and the real edge quality. Most programs close embroidery approval on the second round, after one round of digitising revisions.
Archive the approved stitch file. A reorder, a new colourway or a new product in the same line should reuse the approved file, not re-digitise from scratch - re-digitising almost always produces a slightly different mark, and consistency across a line is the point.
Legibility Rules: Letter Height, Stroke Width and Detail Loss
Embroidery has hard physical limits, and artwork that ignores them will be simplified by the process whether the brand intends it or not. Stating the limits in the brief prevents an argument at sample stage.
Minimum letter height is the most important number. Below roughly 5 mm of cap height, thread cannot form a recognisable letterform on a coated shell; 6-8 mm is comfortable for a wordmark and above 10 mm is safe on textured or padded surfaces. Note that lowercase letters need proportionally more height than uppercase to stay legible, which is why many embroidered marks are set in caps.
Minimum stroke width is around 1.2 mm for satin columns; below that the column cannot hold two passes of thread and begins to look like a running stitch. Minimum gap between two elements is around 1 mm, because fabric movement closes the space.
Detail loss is the practical consequence. Fine serifs, hairlines, small internal elements and tightly packed multi-element logos should be simplified before digitising - not after. A common and effective solution is a lockup: a simplified embroidered icon paired with the wordmark set in a larger, cleaner size, rather than shrinking a complex full lockup.
Outlines and borders need their own rule: an outline thinner than roughly 1 mm will wander, so either thicken it or remove it. And gradients, shadows and photographic effects should be removed entirely, since thread cannot render continuous tone.
Finally, remember that legibility is judged in motion and at distance, not on a flat sample under a lamp. Check the mark on the assembled product, from a metre away, before approving the digitised file.
Colour: Thread Matching, Sheen and Metamerism
Thread colour is where embroidered programs most often disappoint, and the reason is that thread is not ink. A dyed thread is a cylindrical, reflective object; a printed ink film is flat. The same Pantone reference therefore reads differently in the two media, and a brand that specifies one code and expects two identical results will be unhappy.
The practical approach is to approve thread colour physically. Pantone is the industry reference standard - see Pantone - and our team issues a thread shade card against the specified codes, then approves the sewn sample under controlled lighting rather than approving a screen rendering.
Sheen is a deliberate design variable. Rayon's high sheen reads luxury and catches light in photography; polyester's lower sheen reads utility and technical. Mixing the two in one mark usually looks accidental, so pick one thread type per design and let the stitch direction carry the light instead.
Metamerism is the trap when a mark appears in both embroidery and print. Thread, ink and a woven label can agree under showroom lighting and diverge in daylight, particularly with dark neutrals and with metallics. Approve all components of the identity package together under at least two light sources before bulk is released.
Colour fastness of thread should be tested alongside fabric, using recognised textile methods published by AATCC, because a thread that bleeds onto a light shell is visible immediately and unfixable after assembly. Test the darkest thread in the system first.
Where a design uses two thread types, keep the sheen difference deliberate and documented, because an accidental mix is one of the few embroidery faults customers can see without touching the product.
Placement and Surface: Padding, Curves and Mesh
Embroidery placement is a structural question as much as a visual one, because a machine head needs clearance and a stable surface, and both are limited on a soft-sided product.
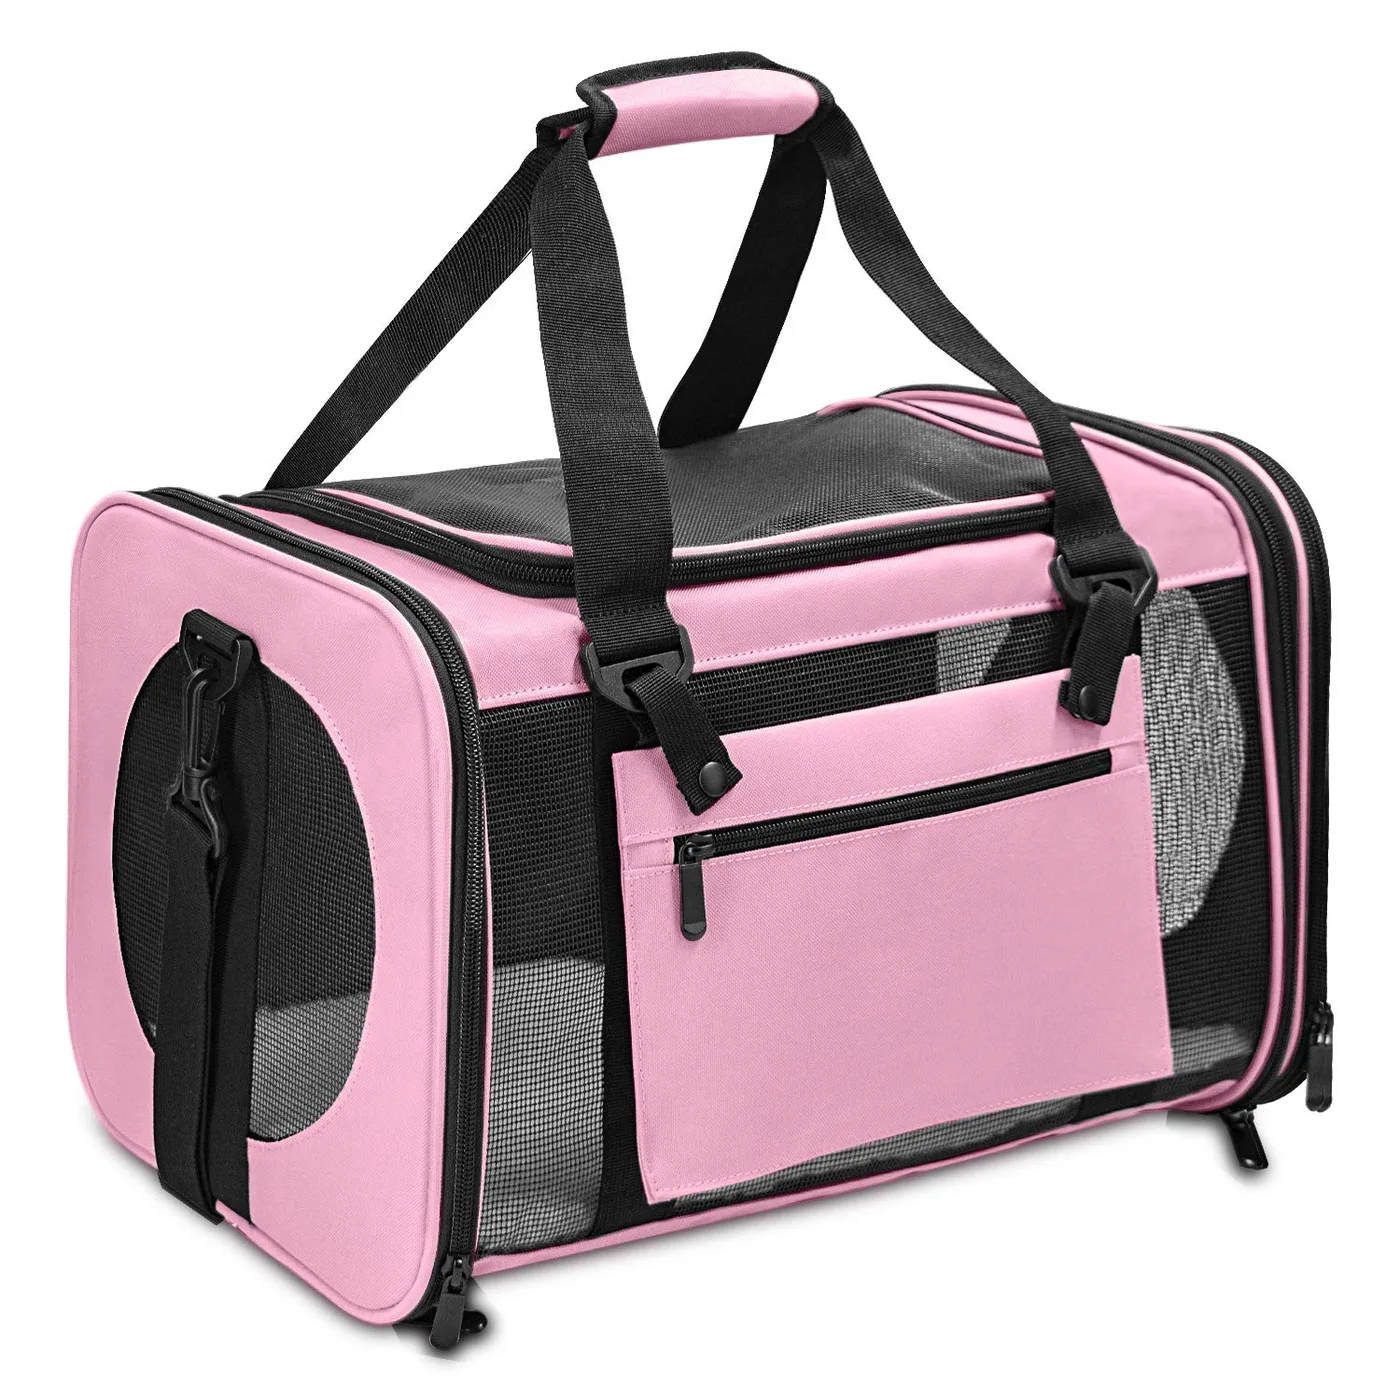
The primary mark belongs on the long side panel, which faces the camera in the three-quarter hero shot and is normally the flattest large surface available. The end cap suits a small icon. The lid suits a mark only if the lid is structured, since a sagging lid distorts stitching under its own weight. The handle wrap suits a repeated motif rather than a logo, and the interior lining is the place for a hidden brand moment that costs little and generates the most sharing.
Padded and quilted panels change the specification. Padding compresses under the hoop, so the design needs a stabiliser and often a slightly lower density to avoid puckering; quilting lines should not run through the mark, because the stitch pattern and the quilting fight visually.
Curved panels - a rounded end cap, a wrapped base - are where an embroidered patch is the better answer than direct stitching. A patch is embroidered flat, finished with a merrowed or laser-cut edge, and then applied to the curve, giving a crisp mark on a surface a machine head cannot reach cleanly.
Mesh and open-weave ventilation fields cannot be embroidered directly; stitches sink and distort the mesh. Brand these areas with a woven label, a printed tape or a badge placed adjacent to the field rather than over it. Keep at least 15 mm of clearance from any seam or zip track regardless of method, and verify legibility on the smallest size in the range.
Cost Model, Durability and Reorder Discipline
Embroidery cost behaves differently from printing and that difference should shape the artwork. Printing charges by colour and by placement; embroidery charges by stitch count. A ten-colour embroidered logo can therefore cost little more than a two-colour one, while a large filled shape can cost several times a compact outline.
The practical levers are clear. Reduce coverage area rather than colour count - an outline treatment instead of a solid fill cuts stitch count dramatically. Use applique for large simple shapes, since fabric pieces replace thousands of stitches. Keep the mark compact and place it once at a legible size rather than repeating it across multiple panels. And reuse the approved digitised file for every subsequent colourway and product, which eliminates re-digitising charges entirely.
Durability is embroidery's strong suit, but it should still be specified. Thread fastness to washing, rubbing and light is assessed by recognised methods published by AATCC; the backing must be matched to the shell to prevent puckering; and the mark should be inspected after a wash test on the production material set, not on a swatch.
| Design decision | Effect on stitch count | Effect on unit cost | Design note |
|---|---|---|---|
| Solid fill to outline | Reduces 40-70 percent | Significant saving | Keeps shape, loses weight |
| Mark size 60 mm to 45 mm | Reduces around 45 percent | Moderate saving | Check legibility at 45 mm |
| Applique for large shapes | Reduces 50-80 percent | Significant saving | Requires clean edge finishing |
| Adding a colour | Minimal change | Negligible | Colour count is not the lever |
| 3D puff instead of flat | Increases 20-40 percent | Moderate increase | Stronger shelf presence |
| Second placement | Depends on size | Adds set-up and cycle time | Usually better as a woven label |
Every program closes with an AQL 2.5 final inspection and a written report, and the quality management system behind production is maintained to ISO 9001 requirements. Hold one sewn golden sample; stitch density, thread shade and backing are all settled against it on reorder.
Embroidery Across a Coordinated Product Line
An embroidered mark earns more when it appears across a line rather than on a single product. Collars, leashes, treat pouches, bandanas and bag holders can all carry the same digitised mark, and because the stitch file already exists, the incremental development cost is close to zero.
The scaling discipline matters: the same file cannot simply be resized for every product. A mark digitised for a 60 mm placement on a carrier panel will not stitch cleanly at 20 mm on a collar, because stitch density and pull compensation are size-dependent. Each significant size step needs its own digitised version, produced from the same master artwork.
Thread and backing should also be matched per product. A collar takes abrasion and needs polyester thread with a durable backing; a bandana is decorative and can carry a softer thread with a lighter stabiliser. Stating these in one specification sheet keeps the line consistent in appearance while appropriate in performance.
Visual consistency is what customers actually notice. One thread shade system, one mark version per size band, and one placement logic - primary mark on the visible face, secondary mark at the closure - makes a mixed set of products read as one coordinated collection.
The commercial benefit is straightforward: a coordinated set sells as a set. When a customer can buy a carrier, a collar and a pouch that visibly belong together, basket value rises without any increase in the cost of the embroidery itself.
The practical starting point is the accessory with the highest visibility - usually a collar or a pouch - because it is carried daily and generates the most impressions per unit of embroidery cost.
Needle size, thread weight and machine set-up
Three machine variables decide whether a design stitches cleanly, and they are specified in the tech pack rather than left to the operator, because a reorder must reproduce the approved result exactly.
Needle size is matched to the fabric: too large and it leaves visible holes that show as puckering around the mark, too small and it shreds thread and slows the run. Thread weight is matched to the design - a finer thread holds detail but covers more slowly, a heavier thread covers quickly but loses small letterforms.
Machine speed is the third variable and the one most often ignored. Metallic thread, dense satin columns and foam puff all require slower running; the same design stitched at production speed rather than sample speed can look noticeably rougher. Where a design is speed-sensitive, state the maximum speed in the specification.
Hooping is the final practical point: a panel hooped under tension will relax after unhooping and the mark can distort. Consistent hooping, with a template or jig for placement, is what keeps every unit identical.
Embroidery, woven label or patch: choosing per surface
Three identity techniques compete for the same surfaces, and choosing the right one per location is what makes a product look resolved rather than over-decorated.
Direct embroidery suits flat or moderately padded panels that a machine head can reach, and it is the strongest choice for a primary mark on the main side panel. A woven label suits narrow areas, seams, edges and anything that needs to be read at close range - it is also the cheapest way to brand a location that is too small for a mark.
A patch suits curved, padded or awkward surfaces, and any location where a crisp edge is needed on an unstable ground. It is also the flexible option: the same embroidered patch can be applied to several products in a line, which spreads its tooling cost.
The usual resolution is one embroidered primary mark, one woven label, and one patch or printed motif elsewhere - three techniques, three locations, one colour system. More than three reads as indecision; fewer usually leaves part of the product unbranded.
Sampling checklist for embroidered programs
Embroidered programs close faster when the sample review follows a fixed list rather than a general impression. Seven checks cover it.
Confirm the mark size in millimetres against the placement drawing. Confirm thread shade against the approved shade card under controlled lighting. Confirm legibility at the smallest size in the range. Confirm coverage - no gaps between satin columns, no fabric showing through a fill.
Confirm edge quality: clean borders, no loose threads, no visible jump stitches. Confirm the absence of puckering by laying the panel flat, not by holding it taut. And confirm clearance from seams, zips and binding at the stated minimum distance.
Photograph the approved panel, keep the physical unit as the golden sample, and archive the digitised file with these results so that reorders reproduce the approval exactly.
Why brands source here
- Pet carrier programs run since 2014; founding team in sewn goods since 2004
- SGS-verified production floor of 4,950 m² with 137 workers across 7 lines
- Monthly capacity of 200,000 units, audited to BSCI and ISO 9001
People Also Ask
Is embroidery durable enough for a pet carrier?
Yes. Embroidery has no film to crack and resists abrasion better than most prints, which is why it is used on handle areas and base panels. Thread fastness and backing choice decide long-term appearance.
What size should an embroidered logo be?
Around 45-70 mm wide for a primary side-panel mark, with a minimum cap height of roughly 5 mm and a comfortable range of 6-10 mm depending on the surface texture.
What is applique embroidery?
Shaped fabric pieces stitched onto the panel with the edges finished in satin stitch. It covers large colour areas at a fraction of the stitch count of a filled design, which reduces cost substantially.
Does adding colours increase embroidery cost?
Only marginally. Embroidery cost is driven by stitch count and coverage area, not by the number of thread colours, which is the opposite of screen printing.
Can you embroider on a backpack-style carrier?
Yes. Backpack panels are usually structured and stable, which suits direct embroidery well, though strap contact areas should use a denser backing and a durable polyester thread.
What is chenille embroidery?
A looped-yarn technique producing a plush, vintage, varsity-style surface. It suits letterforms and simple badges and is less crisp than satin, so it is not used for detailed marks.
How do I keep an embroidered logo consistent on reorder?
Archive the approved digitised stitch file, the thread references and the backing specification, and keep one sewn golden sample. Reorders are then built from the same file rather than re-digitised.
Frequently Asked Questions
What is the MOQ for an embroidered pet carrier?
MOQ 500 pieces per colourway is the standard floor. Embroidery carries a digitising charge rather than a per-colour screen charge, so low quantities are less penalised than in screen printing but per-piece cost stays higher.
How long does an embroidered sample take?
Sample rounds run 6-10 working days each. Most programs close in two rounds: the first to check construction and placement, the second to approve the digitised mark, thread shade and backing on the production fabric.
Can you embroider any logo?
Most logos, with simplification. Fine serifs, hairlines and gradients do not stitch cleanly, so artwork is usually adjusted to a minimum letter height of about 6-8 mm and a minimum stroke of about 1.2 mm before digitising.
What is 3D puff embroidery?
Foam placed under a satin stitch, stitched over and trimmed, leaving a raised sculpted mark. It suits a bold icon or short wordmark, needs simplified artwork, and performs best on structured panels.
Which thread type should we choose?
Polyester for washability and strength, rayon for sheen and premium appearance, metallic for special effects with simpler artwork. Choose one thread type per design so the sheen reads consistent.
Can you match our Pantone colour in thread?
Yes, against physical Pantone references with a thread shade card, approved on a sewn sample under controlled lighting. Expect thread to read slightly differently from the same code printed as ink.
Can embroidery go on mesh or padded panels?
Not directly on mesh, which distorts under stitches; use a woven label or badge beside the field. Padded panels can be embroidered with the correct stabiliser and a slightly reduced density.
Why does embroidery pucker?
Usually a backing mismatched to the fabric, a needle too large for the shell, or excessive stitch density on a light fabric. All three are specified in the tech pack and fixed at sample stage.
Is embroidery more expensive than printing?
Per piece, usually yes at comparable coverage, because cost is driven by stitch count. It becomes competitive for small, multicolour marks, where printing would charge per colour per placement.
Can we reuse our embroidery file on other products?
Yes, and it is recommended. The approved digitised file is archived and reused across colourways and across other products in the line, which avoids re-digitising charges and keeps the mark consistent.
What backing do you use?
Cutaway for lasting stability on soft or padded panels, tearaway for stable woven shells, and a wash-away topping on textured or pile surfaces. The choice is matched to the specific shell fabric.
How is embroidery inspected before shipment?
Under an AQL 2.5 final random inspection that includes stitch coverage, edge quality, thread shade consistency, placement accuracy and any puckering or loose threads.
Can we combine embroidery with a printed motif?
Yes, and it is often the best answer: an embroidered primary mark for perceived quality plus a printed or sublimated secondary motif for complexity, both sharing one colour system.
Talk to QUANZHOU JUNYUAN BAGS about a pet carrier program: MOQ 500 pieces per colourway, samples in 6-10 working days, bulk production in 35-50 days under AQL 2.5 inspection.
Get a free quote Request a sample