Mesh Fabric Types: Airflow and Durability
Three mesh constructions cover nearly every custom pet carrier programme: warp-knitted tricot mesh at roughly 75-85% open area, three-dimensional spacer mesh at 55-70% with 2-4 mm loft, and PVC-coated grid mesh at 35-50% open area. Specify spacer mesh when you need airflow plus structure and claw resistance; specify coated grid where puncture resistance dominates and airflow can be supplemented elsewhere. All three are available at MOQ 500 per colourway and ship against AQL 2.5 inspection.
Executive Summary
The ventilation window is simultaneously the most functional component of a pet carrier and the most visually dominant one. It occupies the largest uninterrupted area of the product's face, it determines whether the design reads as a pet product at all, and it is the part most likely to be damaged in service. Treating it as a simple cut-out panel to be filled with whatever mesh is available is how otherwise good designs fail.
This guide covers the four constructions worth specifying, how to read open-area figures honestly, what actually determines claw survival, why mesh colour matching is harder than shell matching, and how to integrate a window into a structured panel without puckering. We also set out the tests we recommend requesting and the mistakes we see repeatedly in first collections. Terms throughout: MOQ 500 units per colourway, pre-production samples in 6-10 working days, bulk production in 35-50 days, final random inspection to AQL 2.5. Samples are developed with our production team at SGS-verified partner facilities under documented ISO 9001 process control.
Bespoke pet carrier development runs 6-10 working days to a first sample and 35-50 days to bulk after approval, both measured from a confirmed tech pack.
Airflow Is a Design Problem Before It Is a Material Problem
Most ventilation failures are not material failures. They are design failures in which a perfectly adequate mesh has been asked to ventilate a box with no other air path. Understanding this changes the specification conversation entirely, because adding airflow is usually cheaper through design than through material.
Air moves through a carrier when there is a path in and a path out, ideally at different heights so that warm air rising creates natural convection. A single mesh panel on one side ventilates poorly regardless of its open area. Two panels — one low at the front, one high at the back or on the top — create a genuine flow path even with material that is nominally less permeable.
Geometry further determines whether that path stays open. A window placed flush against the animal's body during carry effectively seals, and a panel that collapses inward under load loses its air gap entirely. This is why spacer constructions, which maintain loft under compression, often outperform theoretically more permeable flat meshes in real use.
- Path: provide intake and exhaust openings, not one larger opening
- Height difference: separate them vertically so convection assists rather than merely permitting flow
- Loft: choose constructions that hold an air gap when the product is compressed in use
- Redundancy: assume at least one panel will be blocked by the animal, bedding or the owner's body
The design implication for brands is welcome: you can specify a more durable, less permeable mesh and still achieve superior ventilation by placing two panels intelligently. Most premium programmes do exactly this and gain both better airflow and better product longevity at once.
Treat it as a whole-system question at sampling. Place a loaded sample in the positions of real use — carried against a shoulder, resting on a seat, held at arm's length — and check whether any path still functions. It is a thirty-second test that repeatedly reveals dead zones no material specification would have predicted.
Finally, remember that airflow interacts with your shell coating. A very tightly coated, impermeable shell makes every breathing path critical; a marginally breathable shell provides background exchange that supplements even poor panel design. Testing airflow as a system rather than as a material property is what separates credible claims from decorative ones.
The Four Constructions Worth Specifying
Mesh families are defined by how they are made, and the manufacturing method predicts nearly every performance property that follows. Four constructions account for the overwhelming majority of carrier programmes.
Warp-knitted tricot mesh is the lightest and most open option, produced on warp knitting machines as a stable loop structure. It is inexpensive, extremely permeable and quite soft, but it snags readily, offers almost no claw resistance and loses shape quickly. It is best used behind a more robust outer layer rather than exposed.
Three-dimensional spacer, sometimes called air mesh, consists of two fabric faces joined by monofilament pile yarns holding them apart. The resulting loft creates genuine insulation and cushioning while maintaining a connected air path, and it recovers well from compression. It is heavier and more expensive, and its open cells can trap debris, though it washes cleanly.
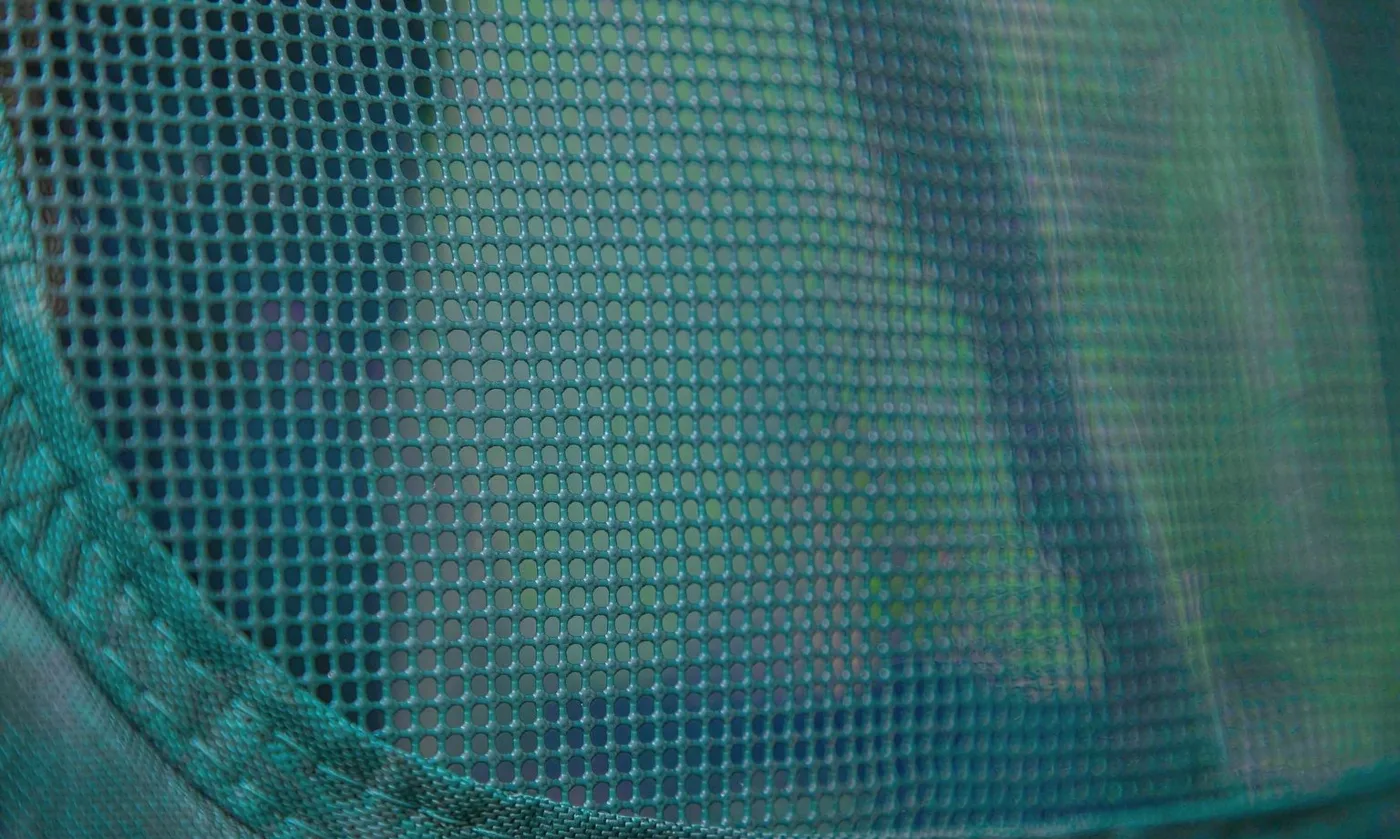
PVC-coated grid mesh is polyester cloth encapsulated in vinyl with a regular punched grid. It cannot snag, resists claws better than anything else in this list, welds cleanly to coated shells, and is the least permeable option. Its stiffness makes panel insertion easy and it reads as technical rather than soft.
A fourth option, fine insect screen in fibreglass or polyester monofilament, occasionally appears for very small pet applications. It offers excellent visibility and flow but poor puncture resistance, so we rarely recommend it except in combination.
| Construction | Open area | Claw resistance | Hand and look | Best application |
|---|---|---|---|---|
| Warp-knit tricot mesh | 75-85% | Poor; snags readily | Soft, fine, textile-like | Behind a protective outer layer |
| 3D spacer / air mesh | 55-70% | Good; loft absorbs stress | Cushioned, sporty, premium | Premium single-layer windows and panels |
| PVC-coated grid mesh | 35-50% | Excellent; cannot snag | Firm, technical, glossy | Exposed windows, outdoor positioning |
| Fine insect screen | 80-90% | Very poor | Invisible, glassy | Small pets, always backed by a stronger layer |
| Tricot behind coated grid | 30-45% combined | Excellent with fine inner feel | Layered, considered | The mainstream premium compromise |
Specify construction rather than appearance. Two samples that look nearly identical in a photograph can differ by an order of magnitude in claw resistance, and that difference only appears after a determined animal has met the product.
Reading Open Area Percentages Honestly
Open area — the proportion of a surface that is hole rather than material — is the most quoted mesh figure and the most misleading without context. It is usually measured optically, looking through the fabric, so a fine dense mesh with many small holes and a coarse open mesh with fewer large holes can return similar numbers while behaving very differently.
What open area does not capture is tortuosity, meaning how convoluted the air path is. A thick spacer with a highly indirect path restricts flow more than its open-area figure suggests. Conversely, a thin flat mesh with straight-through holes outperforms its number. Thickness and open area must therefore be read together.
Compression behaviour is the second omission. Open area is measured flat and unloaded; in use, a window may be pressed against an animal, a car seat or the owner's body. Materials that hold loft under compression retain genuine airflow where others collapse to near zero, which is precisely why flat open-area comparisons reward the wrong materials.
- Ask how open area was measured and whether thickness is included in the figure
- Test airflow of the assembled product rather than the swatch alone
- Assume one panel will be obstructed and specify for that condition
- Treat layered constructions conservatively; combined figures are far below either layer
When a genuine airflow figure matters — for a retailer or a regulatory submission — ask for a permeability test rather than an open-area percentage. Standardised textile and material test procedures, such as those maintained by ASTM International, define how such measurements are taken, and a documented result defends a claim that a percentage never will.
Durability: Snagging, Burst Strength and Real Claw Behaviour
Claws damage mesh through snagging rather than tearing. A hooked claw catches a single loop or filament and pulls it, extending the damage laterally across the panel. Constructions made of continuous filament loops are therefore far more vulnerable than those with encapsulated or monofilament structures, regardless of how strong the base yarn tested in isolation.
This explains why standard tensile and tear data rarely predict field survival. Request instead a snag test appropriate to the application, or run something simpler and honest: draw a representative claw across a tensioned sample twenty times and examine it. Crude, repeatable, and far more informative than a specification nobody will ever encounter.
Layering is the standard remedy. A coated grid mesh outside with a fine tricot or spacer behind it gives the animal something soft to touch while giving the claws something they cannot catch. The composite has lower combined open area than either layer alone, which reinforces the point made earlier about designing airflow in rather than merely selecting the most permeable material.
Burst strength — resistance to a protruding load pushing through — matters for a different reason: excited animals press against windows. A window that bows outward permanently is one of the ugliest failure modes in the category, and it photographs badly in exactly the user-generated content you want circulating.
Finally, consider the edge. Most mesh failures begin at the binding, not mid-panel, because the binding concentrates both tension and abrasion. Specifying a bound or welted edge rather than a simple turned seam meaningfully extends window life at negligible cost.
Visibility, Photography and the See-Through Problem
Mesh choice is also a communication choice. Highly transparent mesh shows the animal clearly, which sells the product in catalogues and generates better owner photography. Highly opaque mesh conceals the animal, which some owners prefer for privacy and a calmer travel experience. Both positions are valid; they simply define different products.
Photography introduces complications nobody anticipates. Fine mesh moirés badly against camera sensors, producing distracting interference patterns in product shots, and it also reflects light unevenly so that window areas read as milky patches. Coarser grids avoid moiré but show their own structure more dominantly, sometimes making the product look industrial.
Colour plays into this more than expected. Black mesh is nearly invisible from outside while giving excellent outward visibility from within; light mesh does the opposite, hiding the animal less and revealing interior soiling more. Black is generally the safer default for a reason that has nothing to do with taste: it hides everything.
Test prototypes under the lighting you will actually shoot in, including flash, because on-camera behaviour differs substantially from what the eye integrates in person. Ten minutes with a camera at sampling prevents discovering an unphotographable product after the catalogue shoot is booked.
Customer photography deserves equal weight, since owners photograph their animals through windows far more often than brands do. A mesh that produces pleasing, softly obscured images of the animal helps generate exactly the user-generated content that sells these products. It is a small consideration with outsized marketing value, and one that is easy to evaluate simply by putting a sample over a lens.
Finally, note that visibility has a welfare dimension buyers increasingly raise. When an animal can see its owner through the window, anxiety typically falls, and designs that provide a line of sight toward whoever is carrying the product tend to generate calmer journeys and better reviews. Siting the window for that purpose rather than purely for symmetry costs nothing.
Colour Matching Mesh to Shell: Why It Is Harder Than It Looks
Every first collection discovers this: the shell and the mesh arrive matching in theory and mismatched in practice. Two materials of different fibre, different construction and different dye process absorb light differently, so even a perfect chemical match reads as two different shades. This is inherent, not a defect.
The practical response is to accept a controlled difference rather than chase an impossible match. Tonal coordination — mesh within one step lighter or darker of the shell, or a deliberate contrast — reads as intentional. Attempting exact equivalence and missing produces the appearance of an error, which is far worse than an obvious decision.
Consider too that mesh sits over shadow and moves constantly, so it rarely reads as a flat colour at all. Matching to the perceived average rather than to a flat laboratory swatch frequently looks better in the assembled product, even when it diverges slightly from what the dip suggested.
Process helps enormously. Both materials should be evaluated side by side under the same lighting at the same time, never against memory or against a screen. Approve physical swatches mounted together as a pair and retain that pair as the reference standard for subsequent lots.
Dye class matters here as well. Solution-dyed and disperse-dyed components may appear identical under one light source and diverge badly under another, a phenomenon known as metamerism that catches even experienced teams and is especially common where the two components have quite different constructions.
Where colour consistency genuinely matters, testing against documented procedures — those published by the American Association of Textile Chemists and Colorists being the usual reference in our industry — converts subjective disagreement into an objective tolerance both sides can measure.
Set the tolerance before production begins rather than arguing about it afterwards. Agreeing that a half-step difference in shade between shell and mesh is acceptable, and writing that agreement into the reference file, saves more time across a product's life than any other single step in colour development.

Structural Integration: Setting a Window Without Puckering
A large window interrupts the tension path of the panel it sits in. The shell around the aperture is loaded differently from the mesh itself, and unless that difference is managed the result is puckering along the seam — immediately visible in product photography and very difficult to remove at a later stage.
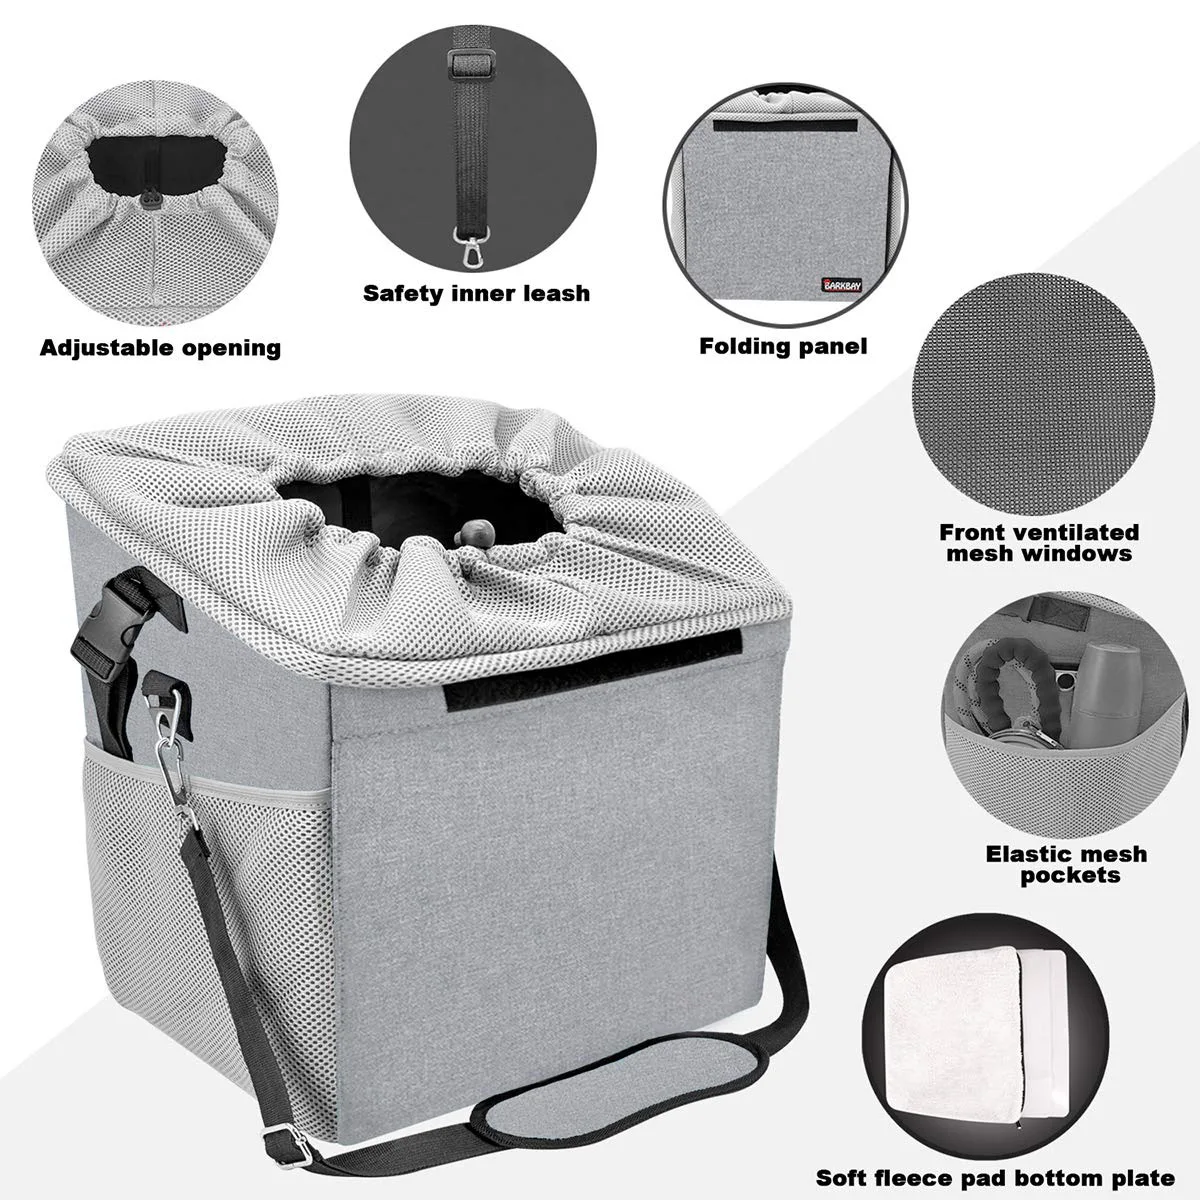
Three techniques resolve it. The first is a frame: a binding or welt that carries the tension and transfers it around the opening rather than through the mesh. The second is stabilisation: a light interlining or stay behind the shell around the aperture, spreading load into the surrounding fabric. The third is simply proportion — keeping the window below roughly 55% of panel width on structured shapes, beyond which more aggressive internal framing becomes necessary.
- Binding: choose a webbing that matches or deliberately contrasts; it will be seen more than expected
- Stays: light internal frame stays let larger windows hold shape without visible distortion
- Radius: rounded corners distribute stress far better than square ones and look more resolved
- Sequencing: set the window before assembling the panel; retrofitting is never as clean
Corner radius deserves particular attention because it is free. A square-cornered window concentrates stress at exactly the point a claw will eventually find, and it looks unfinished. A generous radius costs nothing and communicates that somebody thought about the design.
Finally, consider how the window behaves when the product is empty and standing on a shelf. This is its most-photographed state in retail, and it is the state in which structural weakness is most visible, because there is nothing inside holding the shape.
Cleanability and Hair Behaviour Over Time
Mesh collects hair, dust and dander by design — it is a large surface with an interrupted texture. The question is not whether it collects debris but whether owners can remove it. Construction determines the answer.
Coated grid mesh wipes clean because its surface is continuous; there is nowhere for debris to lodge beyond the holes themselves, and those pass a cloth easily. Knitted meshes hold hair in their loop structure, where it requires brushing or vacuuming. Over a year this difference dominates owner satisfaction more than any other mesh property, despite rarely featuring in specifications.
Spacer mesh occupies the middle ground: its open cells shed debris reasonably well but can trap it at the junction between face fabric and pile yarns. Rinsing works well, which suits owners who hose down products, and the material dries quickly because its structure encourages drainage.
Washing behaviour also distinguishes the options. Coated meshes tolerate machine washing poorly at higher temperatures, risking delamination of the coating from the base cloth. Knitted meshes tolerate washing well but may lose shape. Spacer constructions generally perform best across repeated laundering, which is one reason they feature in most of our longer-lived programmes.
Practical advice for brands: if your product will be used predominantly indoors by small animals, cleanability can be relaxed slightly in favour of softness and visibility. For larger animals, outdoor positioning or multi-pet households, prioritise coated grid because nothing else survives weekly cleaning.
Odour retention follows the same pattern, since trapped organic material is what eventually smells rather than the mesh polymer itself. Constructions that release debris readily also release odour sources readily, which is another argument — beyond durability — for choosing a wipe-clean structure even where softer options feel more appealing in the hand.
A Window Specification Checklist and the Mistakes to Avoid
Ten lines in a specification prevent most window problems, and each line corresponds to a failure we have seen repeatedly. Write all of them rather than relying on a sample that happened to come out well.
- Construction type and, where relevant, loft thickness in millimetres with tolerance
- Whether the window is single-layer or composite, and in what layer sequence
- Binding specification, including width, material and whether it is matched or contrasting
- Corner radius, stated as a dimension rather than left to pattern-maker discretion
- Snag or claw behaviour requirement, however simply expressed, with an agreed test sample
- Colour reference approved as a mounted pair against the shell, retained physically
- Open area or permeability target with the stated measurement method
- Whether a frame stay or interlining is required around the aperture
The recurring mistakes cluster predictably. Specifying the most permeable mesh available and then discovering it snags everywhere. Matching mesh colour to the shell on screen rather than physically. Treating the window as decoration and leaving its structure to whoever cuts the sample. And forgetting that this is the one component every owner looks at most closely, every single day of ownership.
Two further mistakes deserve mention because they are expensive rather than merely unfortunate. The first is changing mesh suppliers without re-sampling: constructions identical on paper differ in hand, coating weight and dimensional stability, and those differences appear as distorted windows. The second is approving one lucky sample, when three consecutive builds are the only real evidence a specification repeats.
Close with verification. Pre-production samples arrive in 6-10 working days; bulk follows approval in 35-50 days; finished goods clear AQL 2.5 inspection before release, with window-specific checks for alignment, tension, twist and pulling.
Order and quality terms
- MOQ 500 pieces per colourway; samples in 6-10 working days
- Bulk production 35-50 days after approval; AQL 2.5 inspection standard
- T/T 30/70 terms, FOB Xiamen, full document set per shipment
People Also Ask
What mesh is best for pet carrier windows?
Three-dimensional spacer mesh is the best single-layer choice for most programmes, offering 55-70% open area with enough loft to resist collapse. Where chewing or clawing dominates, PVC-coated grid mesh performs substantially better and should be layered with a fine inner mesh.
How much open area does a carrier actually need?
Less than most designers assume, provided there are two window positions creating a genuine flow path. A combined system with two 45% open panels usually outperforms one 85% panel, because real airflow depends on intake and exhaust rather than permeability alone.
Which mesh resists claws best?
PVC-coated grid mesh, because its encapsulated structure offers nothing for a claw to catch. Knitted tricot snags most readily. Layering a coated outer grid over a fine inner mesh delivers both protection and a softer contact surface.
Can mesh be colour matched exactly to the shell?
Rarely. Different fibre, construction and dye process mean even a perfect chemical match reads as a different shade. Plan a controlled tonal relationship rather than chasing exact equivalence, and approve both materials mounted together physically.
Why does my window pucker after sewing?
Because the aperture interrupts the panel's tension path. Use a binding to carry tension around the opening, add an interlining or frame stay behind the shell, keep windows below roughly 55% of panel width, and use generous rounded corners.
Which mesh is easiest to clean?
Coated grid mesh wipes clean because its surface is continuous. Knitted meshes hold hair in their loops and require brushing. Spacer constructions rinse well and dry quickly, performing best across repeated laundering cycles.
Frequently Asked Questions
What is the minimum order quantity for mesh panels?
MOQ is 500 units per colourway for all standard mesh constructions. Speciality spacer constructions with unusual loft may carry a mill minimum, which we confirm at quotation rather than after sampling begins.
How long does window sampling take?
Pre-production samples take 6-10 working days once specification and colour references are agreed. Because window changes are structural rather than only material, we recommend sampling any unusual aperture before committing to bulk.
What is the bulk production lead time?
Bulk production runs 35-50 days following sample approval and deposit. Standard constructions sit at the shorter end; speciality spacer or custom-coloured grid meshes may add a week for knitting or coating setup.
How are windows inspected before shipment?
Final random inspection follows AQL 2.5 for major defects. Window-specific checks cover alignment relative to the panel, even tension without puckering, twist or skew in the grid, and pulling or distortion at the binding.
Which mesh should I choose for airline-friendly designs?
Airline rules address which directions may be ventilated rather than specifying mesh type. Most airline-compliant designs use coated grid mesh because it resists damage best, supplemented by secondary panels to preserve adequate airflow.
Does a second window really help airflow?
Substantially. Two openings at different heights create convection, moving considerably more air than one larger opening of the same total area. This is the single most cost-effective airflow improvement available in most designs.
Can the mesh be printed with a logo?
Rarely, and never well. Printing reduces open area, stiffens the structure and tends to flake off the filaments. Identify the product elsewhere and leave the window doing its job rather than carrying branding.
Will black mesh make the interior too dark?
It darkens the interior somewhat, though the effect is smaller than most people expect because the human eye adapts quickly. Black mesh remains the preferred default because it conceals soiling and gives excellent outward visibility.
Is spacer mesh heavier than flat mesh?
Yes, though usually not decisively. A 2-4 mm spacer adds modest mass while contributing cushioning and loft that many programmes otherwise buy separately from foam or interlining, so the difference is frequently recovered in the bill of materials.
Can you test how much air a finished carrier passes?
Yes. We can arrange permeability assessment on the assembled product rather than the material alone, which is the only figure that reflects how the design actually performs when a panel is obstructed in normal use.
What causes mesh to tear near the binding?
Stress concentration at the seam, usually combined with an insufficient radius at the corners. Specifying bound rather than simply turned edges, and increasing corner radius, resolves most cases without changing the material at all.
Are recycled mesh constructions available?
Recycled polyester versions of tricot and some grid meshes exist and perform comparably. Options in spacer constructions are more limited, so confirm availability early if recycled content is a programme requirement.
Do all of these meet safety expectations for pet products?
All can, though suitability depends on construction quality and the claw behaviour tested for your specific application. We recommend a snag and burst assessment against your actual use case rather than relying on generic datasheets.
Can a window be added to an existing design?
Often yes, though not always cleanly. Retrofitting usually means adding interlining or a frame stay to manage tension. Sampling first is essential, since an added aperture behaves very differently from one designed into the original pattern.
Talk to QUANZHOU JUNYUAN BAGS about a pet carrier program: MOQ 500 pieces per colourway, samples in 6-10 working days, bulk production in 35-50 days under AQL 2.5 inspection.
Get a free quote Request a sample